Featured
7 Things You Can Do To Make Windows 10 Faster Than Fast
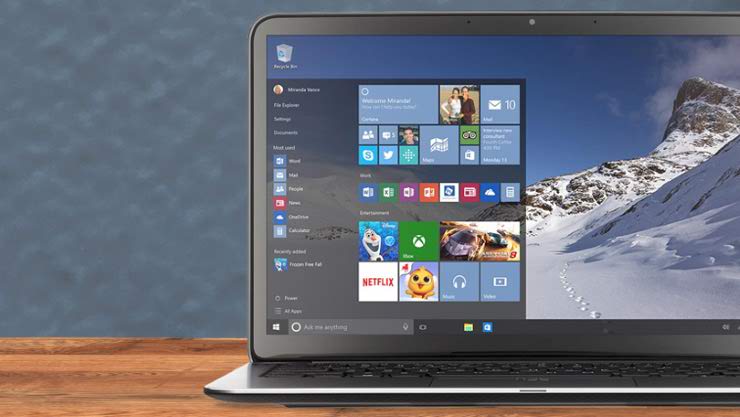
An upgrade to Windows 10 requires your hardware to be upgraded as well. There are chances that you fall short of hardware requirements to run the latest operating system. In case your system is capable enough to run it but not smoothly, there are various options available to maintain the smoothness of your system. These options disable or partially disable the non-recommended features to ease the load on your system and make it work faster. Following is the list of options through which you can optimize your Windows 10 to run faster than fast.
Disable Shadow and Animation Effects
Windows 10 offers some eye-catching transition effects and shadows by default which make it look more beautiful and smooth. But these effects slow down your system’s performance if you have a low end system. It takes a lot of RAM and GPU to load which makes your system to lag. Thankfully, there is an option available to disable these effects to boost the performance a little. Simply navigate to System> Properties> Advanced. From there under the Performance group click on Settings.
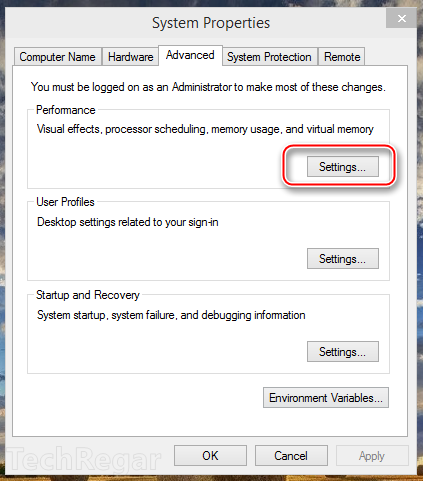
Uncheck all the options available in visual effects. Once disabled, you will feel a huge boost in performance.
Disable Transparency
Transparency is another cool looking feature available in Windows 10. Like Shadow and Transition effects, it also consumes a lot of memory and GPU resulting in low system performance. But again there is an option available to disable this. Navigate to System> Personalization> Colors, scroll down and disable Make Start, taskbar and action center transparent.
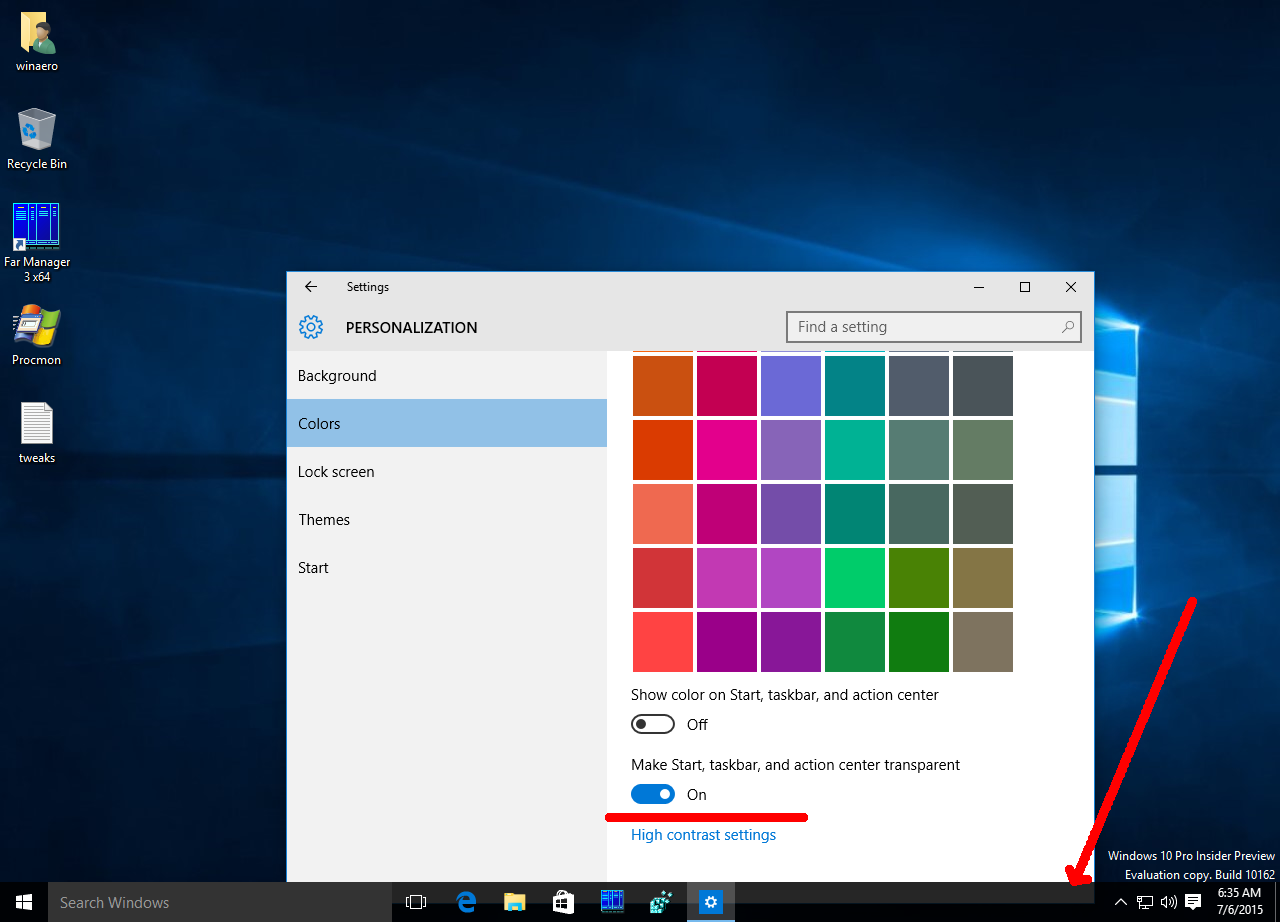
Though you will lose some visually appealing features of Windows 10 but you will gain a lot in terms of performance.
Disable Unnecessary Services
Windows 10 is not all about visually appealing user interface, but it has lots of features and services which are running in the background to help you maintain your comfort and ease of working. But not all services and features are necessary for all. There are too many services which are not of any benefit to a normal user but still they are running and eating up your memory. You can disable these services which you do not want to use. Head on to Computer Management> Services and Application> Services. You will be shown a list of services running in your system. To close any service just right-click on it and select Stop.
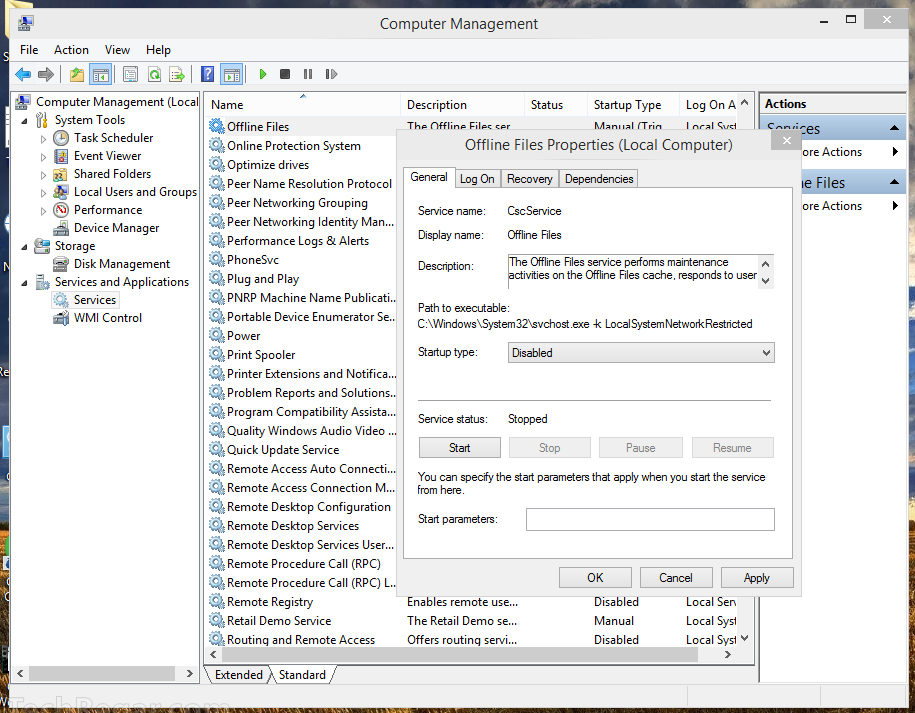
It is recommended that you first search about the service you want stop before doing so because various services are core applications of Windows 10. You might not be able to use your Windows without that service until you start it again.
Disable Startup Applications
Some applications are set to launch automatically when your system starts up. Not only it makes your system to take more time to load, but also affects the overall performance of your system. But Microsoft has provided a tool named as Task Manager to control the application and processes. To prevent those applications from launching automatically, run the Task Manager by pressing Ctrl+Alt+Del. Click on the Startup tab and you will be shown a list of applications which launch automatically.
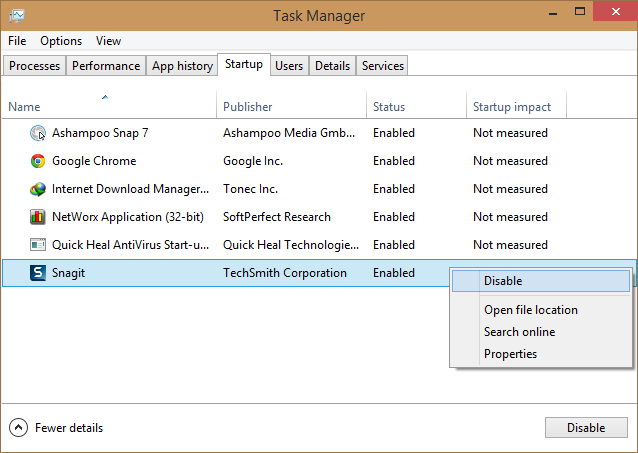
Right-click on the application which you want to prevent from loading automatically and select disable.
Disk Defragment
One of the major cause of system slowing down is the inefficient allocation of memory units on hard drives. Same is the case with Windows 10. Like all previous versions of windows, Windows 10 is also equipped with defragmentation tool which not only creates space in your hard drive but also speeds up your system by increasing the read/write speed of data in and from hard drive.
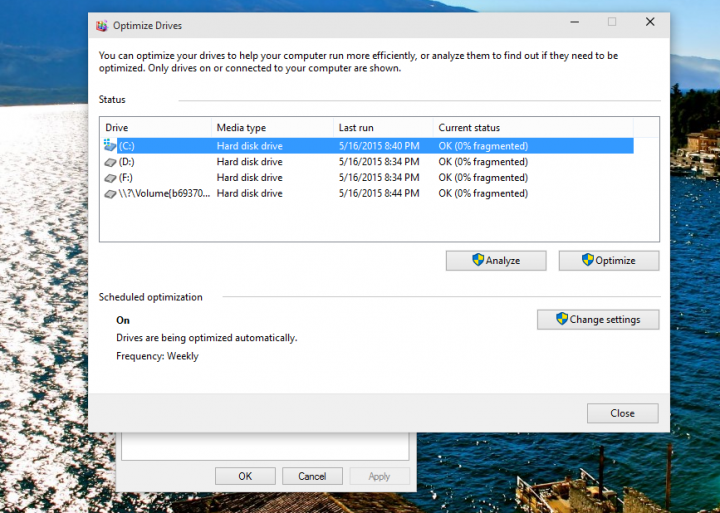
To maintain the smoothness of your Windows 10, run this defragmentation tool at least once a month.
Disable Search Indexing
Searching no doubt is a must have utility feature for any operating system. Windows 10 integrates a more effective search option which even accesses your indexed files to show you relevant search results. But do you really need anything from indexed files? Most commonly, NO is the answer. It takes more time to show you results and memory as well as resulting in other programs to slow down. To get rid of that effective searching, simply disable search indexing or tune your indexer according to your requirement.
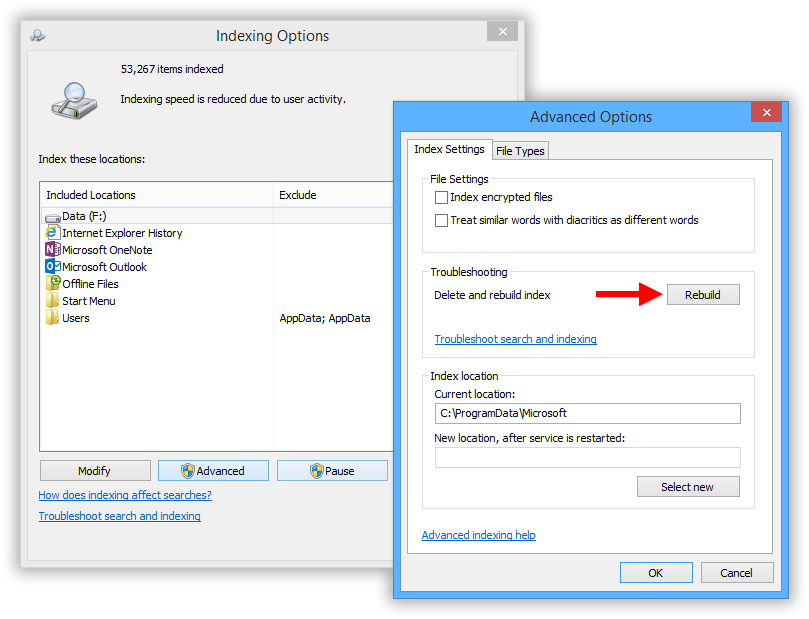
To do so, run “control.exe srchadmin.dll” command. Indexing window now opens. Go to Modify and uncheck all options or do according to your requirement.
Increase Virtual Memory
If you run too many applications simultaneously you might see your system slowing down, that’s the sign that your operating system needs more RAM. Windows 10, with so many services running in background, requires more memory to run smoothly. To fulfill the requirement of more memory for Windows 10 to run faster, you need to increase the virtual memory (paging file), which utilizes the memory of your hard drive to work along with RAM to store temporary files. To do so, open System Properties, go to Advance tab and click settings under Performance tab. Go to advance tab and select change. Uncheck “Automatically manage paging file size for all drives” and check custom size.
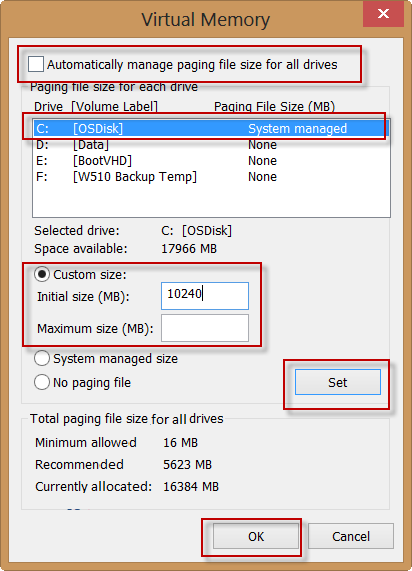
Fill in with the amount of memory you want to relocate to virtual memory and select apply. Changes will take effect after you restart your system.


