Windows
How to Make Bootable USB for Windows 10 Installation

Ever since Windows 10 has hit the market everyone is eager to install it by hook or by crook but the DVDs haven’t reached the market yet. So, what can you do now? Wait months for the official DVD to release? Of course not! The year is 2015 and you can now make anything out of anything. We are sharing a small guide to make a bootable flash USB drive for the installation of Windows 10. That’s right! In just a few easy steps you will learn how to make a bootable USB Drive which you can use anytime to install Windows 10.
Also Read: Best Free Tools to Create Bootable USB for Windows Installation
What you’ll need:
A USB Flash Drive – The first thing that you’ll be needing is obviously a USB Flash Drive of at least 8GB judging the size of the OS.
Windows 10 ISO File – You’ll be needing the Windows 10 ISO file which is easily available on the Microsoft website for anyone to download.
RUFUS Bootable USB Maker Tool – This is the main tool that’ll be doing the magic you need. RUFUS easily transforms used your ISO file via a USB to make it bootable. You can get it HERE.
Step by Step Guide to make Bootable USB for Windows 10
Step 1: Open the RUFUS USB Maker Tool
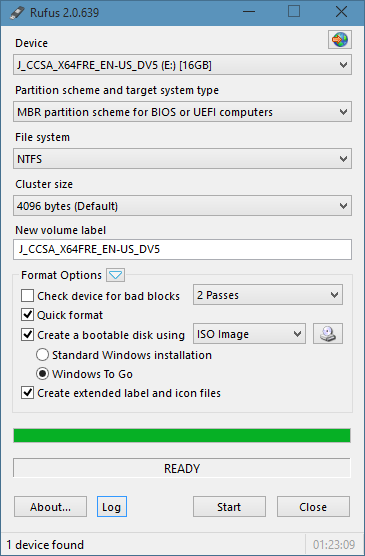
The first thing you need to do is open up the RUFUS USB Maker Tool that you’ll be needing to make Bootable USB. It’ll look something like this.

Step2: Locate the Bootable ISO file.
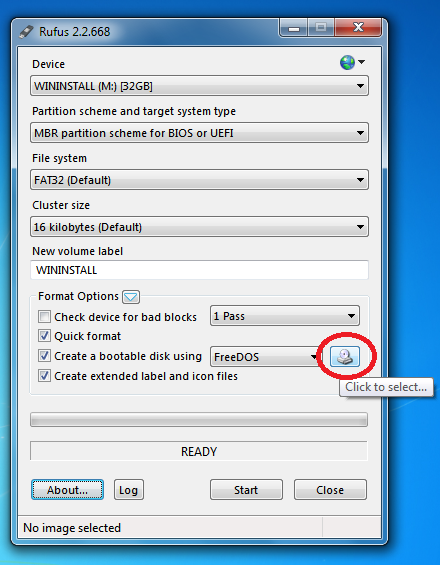
You will see a small DVD/CD rom drive icon as marked in the picture, click on that and select your ISO file. Also make sure you have selected your USB device.
Step 3: Make Bootable USB
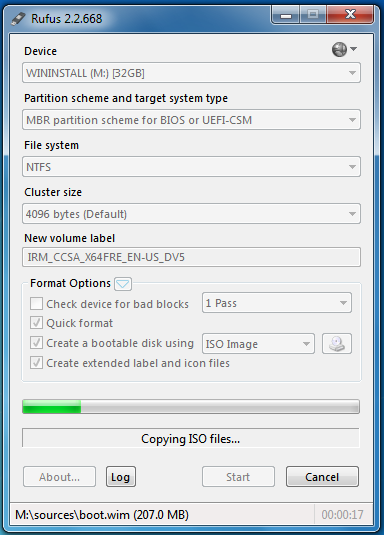
After you select both of these devices you’re ready to make your USB Bootable windows. Hit the button below and start the bootable USB process.

It will approximately take around 10 minutes to make your bootable USB. Make sure you keep this USB safe afterwards so that you can always use it for Windows Installation.


