Featured
8 Hidden Features Of Windows 8 We Bet You Don’t Know!
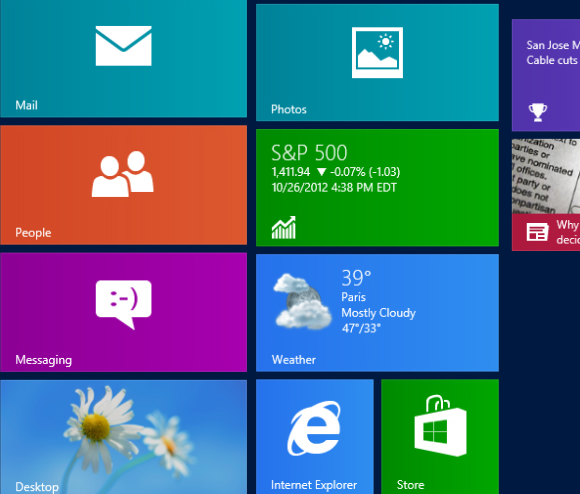
Windows 8 brings to us the best of both worlds- the ‘Desktop’ mode, which looks and feels a lot like gold old Windows 7. And there’s the all-new Start Menu, which is a radical change from the previous Windows OS versions.
If you’ve just upgraded to Windows 8 or are looking forward to upgrading to Windows 8, it may take you time to unearth all the useful and handy features and secrets Windows 8 has. So here are some awesome features and shortcuts you might want to know.
Hidden Features Of Windows 8
1. The ‘hidden’ Start Menu
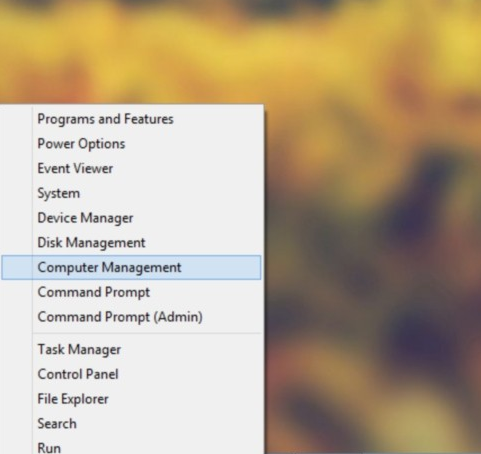
2. Sync your setting across Windows 8 machines
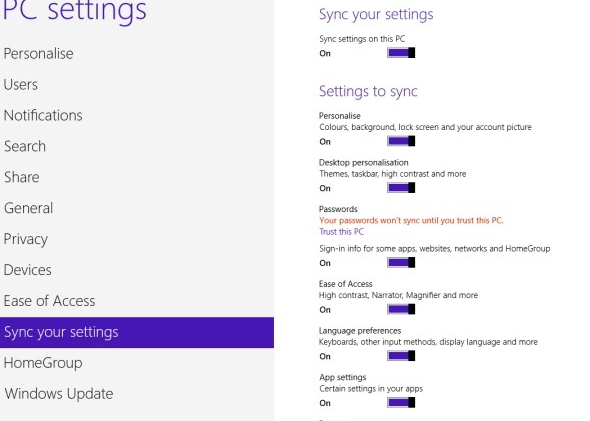
To configure this hidden feature, just launch the ‘Settings’ Charm, click on ‘Change PC Settings’ and open the ‘Sync your settings’ tab.
3. Take Screenshots easily and quickly
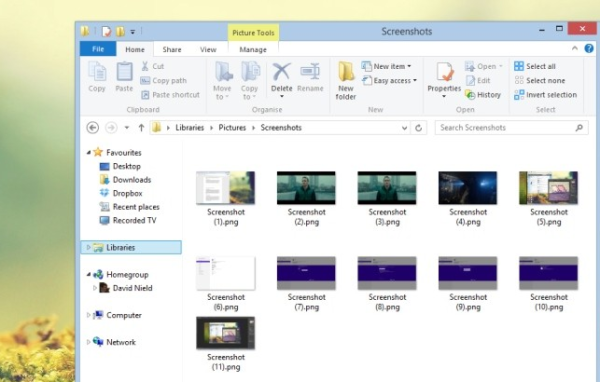
For taking screenshots earlier, you had to press Print Screen, then open up an app like Paint or the GIMP and paste in your screenshot from the clipboard. Nothing absurd like that in Windows 8. To take a screenshot in Windows 8, just press Win+Print Screen and the screenshot is saved in the ‘Pictures’ folder by itself. A very simple shortcut for taking screenshots.
4. Enable Start Screen Animation
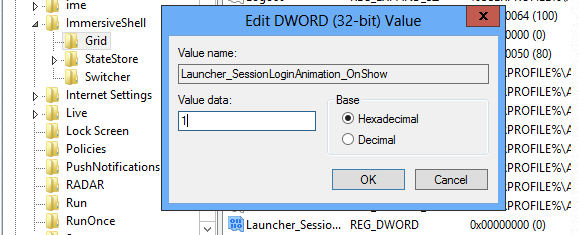
When you first sign onto Windows 8, you get a very cool flow-y animation of all your tiles filling up the screen. After that, though, the Start screen has a much more toned-down animation. Not to worry, a simple registry tweak is what it takes to fix this. Open the Windows Registry editor by pressing Win+R and typing “Regedit”.
Tree to find HKEY_CURRENT_USER\Software\Microsoft\Windows\CurrentVersion\ImmersiveShell\Grid, and with the entry opened, right-click in the right-hand pane and select New > DWORD (32-bit) Value, which you should name Launcher_SessionLoginAnimation_OnShow. Open this, and change the value to 1, then click OK and close Registry Editor. When you hit the Start button, the tiles will be animated.
5. Adjust the number of Rows on the Start Screen
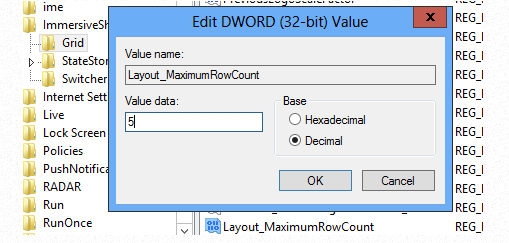
Once created, double click the entry, set the Base to Decimal and alter the value – you can have as many as five rows. After making the change, click OK, close the registry editor and logout of Windows 8. When you log back in, the Start screen layout will have been altered. Simple, new rows will be added ready to be customised.
6. Schedule Maintenance of your machine
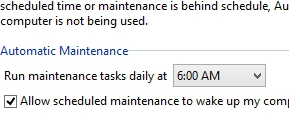
Yes, Windows 8 can now be scheduled to perform tasks like software updates, security scanning, and other important ones daily. Just go to the Action Centre and you can setup the time for scheduled maintanence and also perform it manually, if desired.
7. Enable Aero Lite
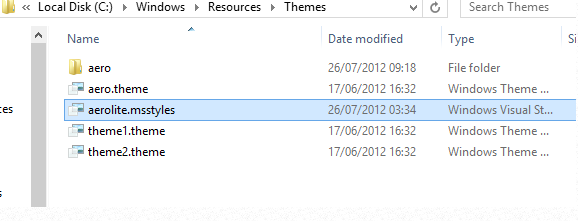
Yes, many people have missing Aero in Windows 8. To activate the Aero Light theme in Windows 8, press Win + R and enter Resources. Open Themes > Aero and copy aerolite.msstyles to the parent folder, Themes, agreeing to the instruction to make the change as an administrator.
Next, you will have to create a configuration file. To do so, copy the aero.theme and paste it to the desktop. Using Open with to view the file in Notepad, go to File > Save as… and save the document as aerolite.theme. You can then make the following changes:
Change line 5 to DisplayName= Aero Lite
Find the [VisualStyles] section (either by scrolling or using CTRL+F) and change the path entry to Path=%ResourceDir%\Themes\Aero\Aerolite.msstyles
Save the file again and open Control Panel > Change the Theme or right-click the Desktop and select Personalization –
That’s it! The Aero Lite theme will now be enabled.
8. Categorize Apps by groups
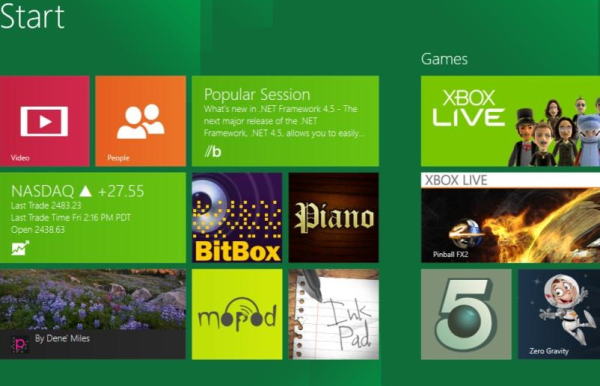
To neatly categorize the apps into particular groups or sections, just drag an app’s tile to an empty space on the Start Screen. It then creates its own group. If you want to name your groups—say, for “Work,” “Games,” and so on—you can do so by clicking the small button in the bottom-right corner of the screen and right-clicking on the groups.
These were the 8 best hidden Windows 8 features and functions we could come up with. Do share with us your experience if you’ve learnt your own hidden features as well. 🙂

